In our continuing series of Workshop crafts, we've got another guest post from Maggy of Redtedart.com. where she regularly crafts with her toddler and brings you weekly How Tos. Previously, Maggy contributed a PlayPennies post on how to make a snake, and today she's going to write about making a robot themed card.
Hi, I am Maggy and over at Red Ted Art we love robots. We have a number of robot books that my 3 year old adores and we have to read regularly! We also love to craft.
A really great way to stimulate and inspire crafting, is to combine story time with crafts – not only does this help generate ideas, but it also helps “embed” concepts with your children. The first time we made a robot, was after reading “Harry and The Robots” and it was demanded by my son that we do so!! And we didn’t just make one, but three! So today, I have our favourite robot book for you, as well as quick, easy and fun craft linked to it.
Harry and the Robots, by Ian Whybrow, is a lovely little book, that I recommend to all toddlers (both boys and girls!). The story is about Harry, whose “real” robot breaks and has to go to Robot Hospital. He is very sad about it, but his fabulous grandmother suggest that they make some of their own in the meantime. Sadly, that night, Harry’s grandmother also falls ill and is taken to hospital. The children are clearly distressed and saddened. Harry decides to make his robots anyway and to take them to his grandmother to help her get better… so robots he makes and his grandmother indeed gets better. It is a lovely little story that helps stimulate the imagination, teaches about caring and maybe even helps reduce anxieties about hospitals and illness.
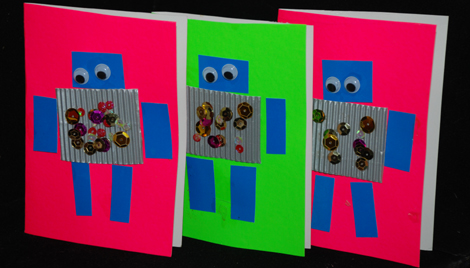
As to the craft – we decided to make some Robot cards – these are great as party invites, as thank you cards or a birthday card for friends and with a little bit of help even 3 year olds can get crafty:
Materials: Card stock for final card, for the body you need some corrugated card or similar (e.g. you could use some foil), card for head, arms and legs, googly eyes, sequins (or similar) for buttons, glue, scissors.
- I cut all the robot “parts” – if you have older children, they can cut these out themselves. You will need one rectangle for the head, one contrasting rectangle for the body, and for rectangles for arms and legs.
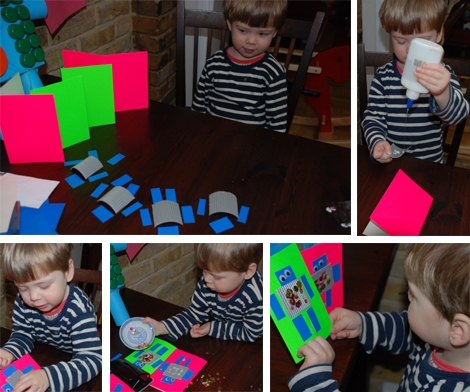
- With younger children it is helpful to lay this out in the final “layout” for them, so that they can see the finished product. I strongly believe that some “mess” that younger children make, is because they cannot “envisage the finished” product. By laying things out for them, you help them see the goal.
- Let your child glue on all the parts on the card – you can either help them apply the glue or let them do it themselves.
- Add googly eyes and sequins for the “buttons”. We simply “covered” ours in sequins, as my son doesn’t like getting glue on his fingers, but of course you can add them neatly. Or you can draw them on or use hole punch cut outs.
And finished!
(Below are a few pictures of Maggy's son in action)


Comments