
 It is amazing how inventive you have to get when faced with more than a week of solid rain during the school holidays. This project was inspired by the Science Museum. In the hands on zone they have for kids, there are some powerful magnets to play with. These are covered in round metal discs, and my son spent ages playing with them, making all sorts of magnetic sculptures.
At home he got some of his magnet sets out and used them to make dinosaur sculptures.
Which gave me the idea to do something with similar with everyday objects you might have around the house. The idea was to make it possible for the sculpture to be changed, and to fit with this I've used some left over blackboard paint I had lying about. This can be drawn on with chalk, and the pictures changed whenever you want.
However you can just as easily use any other kinds of paint.
 For this project you will need:
- Cardboard
- Paint
- Scissors
- Paintbrushes
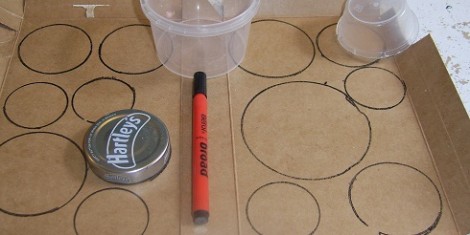
For the cardboard, I broke open empty cat food boxes. I decided on circles for my shapes, but you could do anything - triangles, squares, rectangles, ovals. Whatever you want and mix them up too.
For the circles, we traced around a variety of different shaped circular objects we had around the house and then cut them out. This is a good exercise in cutting for older children, especially those that need some practice with scissor control and co-ordination.
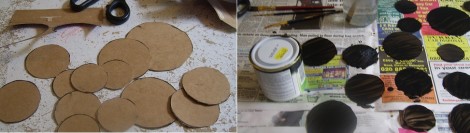
Once the discs or shapes are cut out, you can paint them. It is a good idea to give this part of the project plenty of drying time. We did one side one day, and the other side the following day.
In retrospect I think I should have glued two discs together, to make them a bit thicker and stronger.
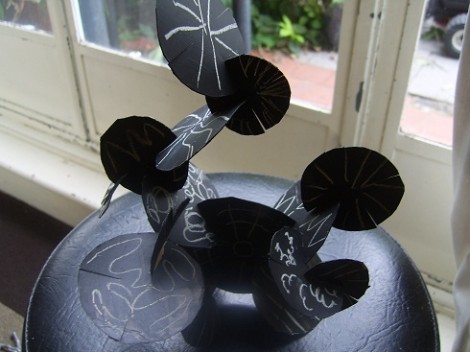
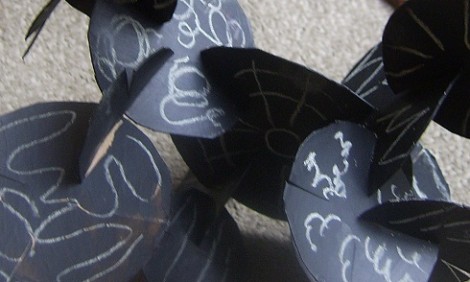
 Once the discs were dry, I cut four slits in each one. My son then chalked out some pictures, and pushed the circles together. If he didn't like the way it was going, he could pull some of the discs out and start over.
With this one, I ended up doing all the painting. My son wasn't remotely interested by that part of the project. But it will differ per child. He is big on construction though. You just have to look around our house at the Lego and Kynex to see that!
So it was fun to make up the scuplture. It was also a good introduction to the concept of sculptures and that will fit in well with art at school. He starts Year 2 next week. Can't believe that he is in the final year of infants already.
OK now I have to go and help my son undo his 'squiggle monster' and turn it into a dinosaur!


Comments