
 It surprised me to find out just how easy it is to make a paper box. Once you've got a template for a box shape, you can adapt it to a lot of different uses. And I also found that kids just love boxes. The empowerment they get from being actually able to make their very own is also quite inspiring.
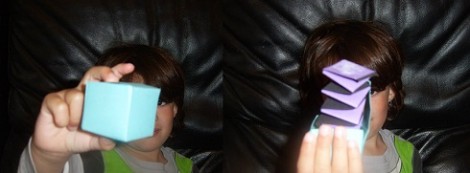
This project shows how to make a box, and how to put something in it. Namely, in this case, a Jack in the Box. It is all made out of paper, and if you want you can decorate it with just pen or crayon so there's no need for additional material. I'd rather put some googly eyes on the 'spring' that makes the Jack in the Box though, for that extra surprise factor.
I do have one word of warning here though for parents. After making this my son spent a couple of hours 'suprising' us with the box. "Look a present for you mummy, open it!". And of course you have to act surprised every time!
The materials you'll need for this project:
- stiff paper or light card, at least two sheets
- items for decorating or pens/crayons/pencils
- glue and sticky tape
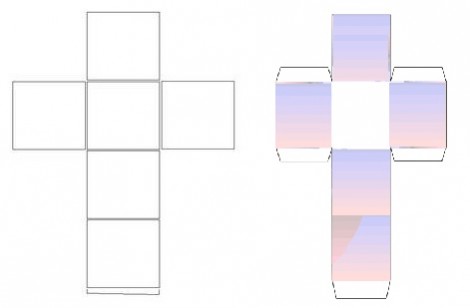
 I've included examples of two types of box templates here. The first one is the same as the one we used, with sticky tape on the inside to hold it all together. If you want a bit more structural integrity, and are a bit braver then me, you could try using the second template with tabs. Then just glue the tabs in when you make up the box.
Next, you need to make up the paper 'spring' for the Jack cut out two strips of paper or card. We used two different colours for ours, but you could cut from the same sheet.
To make the spring, springy, fan-fold each strip. A fan fold is made by folding over a portion of the paper. Crease it, turn it over, and keeping the first fold closed, fold the paper back the other direction. Make sure this matches the size of the first fold. Crease the new fold. Keep going until all the paper has been folded, but make sure you don't go mad as it will have to fit inside the box you've made.
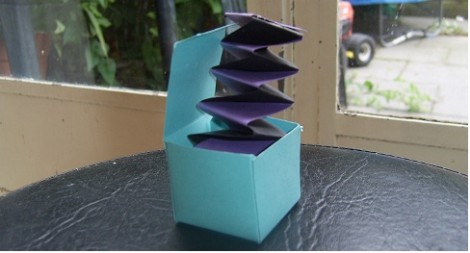
Here's a couple of tips when making your box. Make sure you have made the lid big enough. I didn't allow enough space for the lip, and as a result the lid won't tuck in properly. So you have to hold it down or the Jack pops right out.
Second, we glued the 'face' right on to the top of the spring. After we'd made it. Next time I would do the first fold, then glue the face on so I can put something weighty on top to hold it down while drying. I'm afraid that our face didn't last too long (and in fact was lost before I could photo it, hence the lack of anything in the photo!).


Comments