This is the best thing I think I have seen this Easter. Yep, even more impressive than the Chocolate Egg Sarnies. Beauty blogger Rochelle Al Ahmed has created this masterpiece that recreates the Cadbury's Creme Egg design on your fingernails. It does look a little tricky to me, but then I'm not exactly used to painting mine. If you want to do it, here's her guide on how to create the look:
1. Prepare your nails by wiping them with nail polish remover to remove any excess oil and applying a base coat – this will prevent any staining.
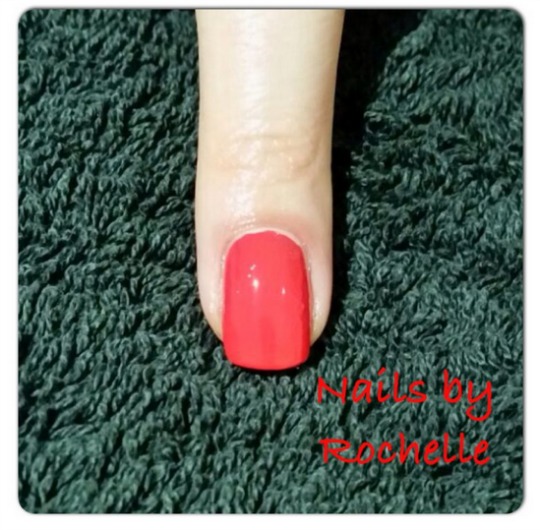
2. Apply one coat of your chosen red (I used OPI ‘Red my fortune cookie’).

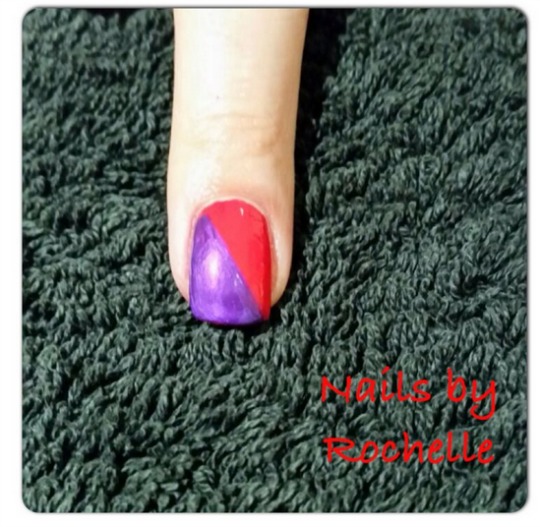
3. Now paint half your nail purple on the diagonal, with the thicker section of purple at the tip (I used China Glaze ‘Coconut Kiss’).

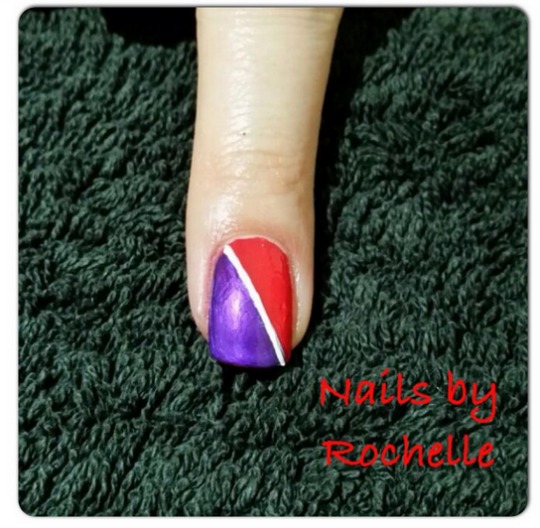
4. Leave your nails for a few moments to dry. Then using a fine stripping brush and white polish (I used OPI ‘Alpine Snow’) paint a thin line where the two colours meet.

5. After a couple of minutes, use a large dotting tool to apply a generous dot of yellow polish (Bourjois no.85 is eggcellent for yolk effect!). Lightly drag the edges outwards to create the broken egg appearance, and add a couple of extra dots around the nail for extra splashes.

6. Wait for the polish to almost dry before adding a layer of top coat.
7. To prevent smudging allow a good 45 mins to 1 hour for nails to dry completely.
8. And ta-da! You have Easter-tastic creme egg nails.
Now obviously Rochelle is a genius, and if you want to see any of her other designs you can see them on her Instagram page here. The Minnie Mouse ones are pretty darn fabulous too. That's it, I'm growing my nails!


Comments